Of course less than a week later it looked like this:

Obviously I need to figure out a better method for this style of
wreath. Anyway, I kept my pitiful wreath up for September because I had nothing
to replace it with. Then it came down to be replaced by a skeleton for
Halloween, so my door currently looks like this:

The other night, I realized that this month is flying by and I’ll need to replace
my skeleton come November…So I decided to repurpose my wreath into a new wreath.
This is a super easy wrapped wreath, like the Mercy Wreath, and obviously can
be made from scratch, without going through the “ugly wreath phase.”

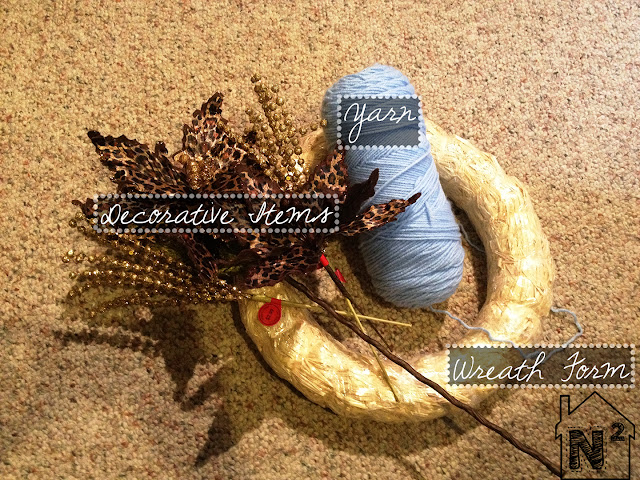
What you’ll need:
½ - ¾ yard each of two different burlap colors
1 Fat quarter of a fabric you like (or scraps, because you’ll only use
about ½ the fat quarter)
1 wreath form
Hot glue gun (not pictured)
Assembly:
Cut All Pieces
Cut burlap into 2 ½ inch by WOF (width of fabric) strips and two 2 ½” x
WOF strips from fabric. Also cut six 2 ½” diameter (approximately, feel free to
eye ball this) circles from fabric. Decide which burlap color will be for your
base and which will be for flowers. Sub cut two of the flower burlap strips
into 2 ½” x 2 ½” squares until you have 26 squares for flowers. Sub cut one of
the base strips into 8 squares (2 ½ x 2 ½) as well.

**TIP - Here’s a neat trick for cutting burlap straight:
 |
| Measure how wide you want the strip to be at one edge of fabric. Cut a small snip about ¼ inch into the fabric. |
 |
| Then pull one burlap strand all the way out. |
 |
| You’ll then have a “gap” to cut along, giving you a straight strip the same width all the way up. |
I did this with the red burlap when I created the “ugly wreath”, but
was in a hurry for this wreath so I didn’t do it with the tan burlap. It still
turned out fine for this project so don’t feel like you have to do this method
with this particular wreath.**
Wrap Wreath Form
Wrap the wreath form with the strips of base burlap. Be sure to glue
only at the back of the wreath form, attaching at the start of the strip with
glue, wrapping tightly with some overlap, and attaching at the end of the strip
with glue. If the end of your strip won’t make it all the way to the back of
the wreath, go to where it last met the back of the wreath and glue there,
cutting off the excess tail. Start next strip at the same spot as where the
previous strip ended, overlapping them slightly. Feel free to wrap around the
whole wreath form twice, especially if you have a wider weave on your burlap
and the form is showing through. Of course, this is one of those times when the
straw form is great, because it was the same color as my burlap so you couldn’t
really see the form through my single wrap job. Ta Da!

Feel free to attach purchased decorations, but with this one I wanted
to make some flowers to pretty up the wreath. I made 2 rolled flowers, 2 all
red folded flowers, and 2 multi-colored folded flowers.
Rolled Flower
 Taking one of the fabric strips, at one end of it use a dab of glue to fold the edge into a small ball. Then twist the fabric as you wind it around the ball you created. While continually twisting, keep winding around creating a spiral disc shape. Add a dab of glue every so often as you wind to keep the spiral from coning or separating from the rest of the disc. When you reach the end of the strip, glue the untwisted tail to the bottom of the disc. Set aside.


Take 3-4 strips of the flower burlap (depending on how tightly you’ll
be rolling and how large you want the flower to be). Use a small dab of glue to
connect the strips end to end, creating one long strip. Now follow the same
twisting and winding technique as before, being sure you’re gluing every so
often. If you get to the end of the strip and the flower is not as large as
you’d like you can easily add another strip by gluing ends together and then
continuing your twisting and wrapping until it’s the size you like, then glue
the flattened tail to the bottom of the disc.

Glue fabric disc to center of burlap disc. You now have a rolled flower
that you can attach to your wreath!
Folded Flower
Variation 1:
Folded Flower
Variation 1:

Take 9 of the burlap squares you cute from the flower strips. Fold one square in half once, and then fold in half again, using a dab of glue in the middle to hold folds together at the folded corner. Do this to the rest of the squares. Using a scrap piece of fabric or burlap, attach 4 folded squares to scrap fabric creating a larger square shape. Be sure to just use a dab of glue at the folded corner to attach at the center. You want your layered edges to be fluffable. Attach 4 more folded squares on top of the first set of squares, but in an alternate pattern, so that you end up with a diamond on top of the first square. (Look at the picture, because that came out a little confusing, sorry.) Use a dab of glue on the folded corner of the final square and put in the center of the flower on point. Fluff edges to “blend” layers enough to hide gaps. Woo hoo, one more flower down!
 Variation 2:
Take 4 flower colored squares, 4 base colored squares and 3 of the fabric circles. Fold all pieces into fourths again, using a pinch of glue (I got sick of say dab) to hold them together. Glue first in second layers of flower the same as above, with the first layer being the flower burlap and the second layer being the base fabric. Then use the 3 folded fabric circles to create the center, still by just gluing them on point in the center. Fluff and done!
Finish Wreath
Lay wreath on flat surface and play with flower placement. Once
satisfied, glue flowers to wreath. Take a longer leftover strip of base colored
burlap, and glue in half to create the hanger. Glue folded strip to back of
wreath. Let wreath hanger set until glue is fully cooled. Hang wreath and
admire!


I know I didn’t take as many pictures of the small steps as I probably
should’ve, so, if you have any questions please feel free to message me and I’ll
try to help make things easier to understand. Enjoy and Happy Fall Y’all!

Linking up with these fabulous blogs: